OK - so here goes. This is my budget back up sled build up. First some background - This isn't a complete first for this sled, I did a big retro fit on the tunnel, seat and coolers last year, along with the air box delete and some other mods, when I put a longer track on. When I first bought this sled, I was looking for a back up sled for me and maybe something my wife/friends could ride from time to time. The deal I found on this sled was pretty much a no brainer and couldn't pass it up, with a little tweaking it became a pretty competent sled for a back up so it all worked out. Too bad my wife doesn't ride it (although she said she would if I painted it pink - not going to happen).
The objective of this is to show folks a little of what I do with it, get some input on it and demonstrate to everyone out there that sledding can be an economical and fun sport. Being that sledding is a bit of a passion for me, you might see things in here that you wouldn't do, and that's OK. No you don't need a 300 HP sled to have fun on the hills. And you can build a decent sled for the hills, with a little know-how, ingenuity, and sweat equity (aka hard work) and not a ton of cash in your pocket.
I hope to update this weekly as things progress or more often, depending on time. This will be the first installment. I usually do all the work myself with the exception of some specialized things like powdercoating, but if you have any questions please feel free to ask. Please feel free to comment and make suggestions if you can. This will probably be the longest post I have on this thread. Always remember to wear the proper safety stuff (eye protection and hearing protection, gloves, etc) when working in your shop. Thanks and see you on the hill!
Pics are attached in order of sequence as well, so easy to follow along.
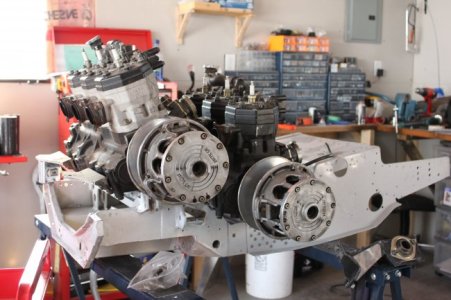
1) Ok so first I have a complete and running sled, but somehow I decided that I should replace the bulkhead with a lighter one (I think it was the summer heat...... actually this was in the works for the last little while). This bulkhead already had a substantial drop and roll, which was a factor in the decision. I was planning on d&r'ing this sled anyway, this just meant it saved me some work (at least on the bulkhead anyway).
2) Tore all the pieces off the donor sled and found some issues, had to straighten a few pieces and found some things that will come out in the wash later, but overall things were in good shape so the decision was made to continue on with the build on this project. If you have any serious concerns about what you are about to do, this is the time to stop, not halfway through. You will still be able to recover most of your costs to this point and you won't end up tearing your other sled down so that you have two non-working sleds") .
.
3) I ended up with another 1/2 sled in my garage (already have 2), which is the donor sled for the bulkhead, so I tore it down, sandblasted it and welded up all the holes and added some gusseting to strengthen it as well. First I measured and squared the bulkhead, then I braced the areas where the chassis will flex as the eventual plan is to put some decent power in place.
Its a good idea to square things up before you start, this is the foundation of where you will be building everything from. Sandblasting before you fix things will really help you to be able to see where things need to be welded etc. Also it removes the grease and grime that will contaminate your welds. Use TIG to weld, you will get the best penetration.
4) Once everything was welded and ground down, I added some rivets and replaced some others that I thought looked loose or didn't like the look of. This is the time to do things right and use the right rivets, don't use the cheap Canadian Tire ones with the aluminum shank, go to Acklands or Bolt Supply or your local outlet and buy some steel shank rivets, they are much better and wayyy stronger.
Use 3/16 rivets if you can, I just use a hand riveter that I drilled out the biggest tip to accept the larger mandrel (shank) on the 3/16 rivets. It takes a lot more to pull them and snap them off, but they are far stronger than the 1/8 rivets. Watch out for flying objects if you use the bigger rivets, the shanks literally fly out of my rivet gun. I also use backer plates/washers to help distribute the load on the surrounding metal, this makes a big difference IMO.
5) Once everything was prepped, I gave it a final wipedown and bead blasted the weld areas to clean up any things I could not get with the wire wheel and grinder or die grinder, then I wiped all the surfaces with alcohol to remove any residue.
6) Yesterday I dropped it off at the powder coaters (JIT Coatings) in Calgary. These guys are awesome and did all the powder coating on my other sled, as well as a bunch of work for my buddies trucks, plus the a-arms and rear susp arms on this sled last year. I can't buy the paint for the price of powdercoating the whole bulkhead. They do great work and can turn things around in short order (unless you want some fancy special colour that changes in the sunlight etc etc).
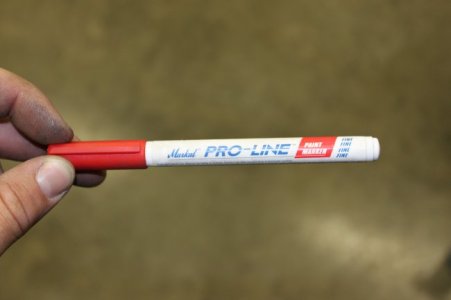
This one is basic gloss black, I will have it by Friday of this week, probably will get a call on Thurs saying it is done. There is a reason I have been a repeat customer. I chose black because it is a very easy colour to match and fix. If the bulkhead gets a chip in it, a jiffy marker is all that is required for touch up.
I didn't bead blast the entire bulkhead so there will be a very very very slight blemish in the powder coating on some of the bigger panels due to the rougher texture of the sand that I used, however unless you get your nose about 1/2" away from it, you won't even notice it. Also, most of the bulkhead is shrouded anyway, so again, very hard to notice. If this wasn't a back up and was going to be a show sled, I would have bead blasted it after the sandblasting.
7) In the meantime I cut a new tunnel extension, and will continue to tear down the rest of the other sled in preparation for swapping the parts to the new bulkhead and completing the drop and roll on the tunnel.
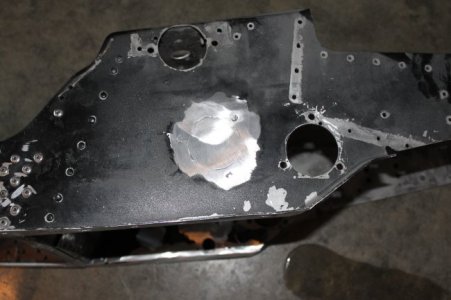
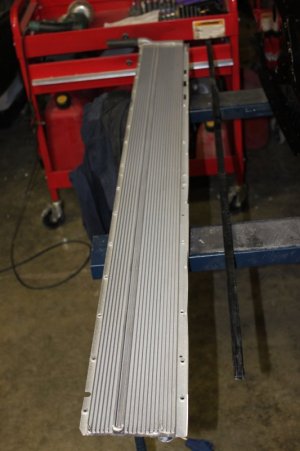
First pic is the bulkhead after I took it off
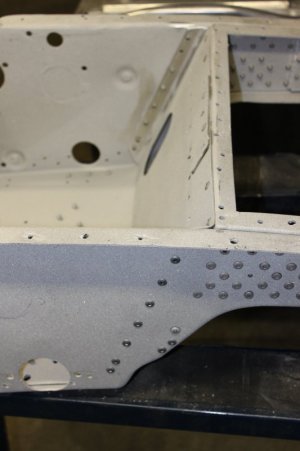
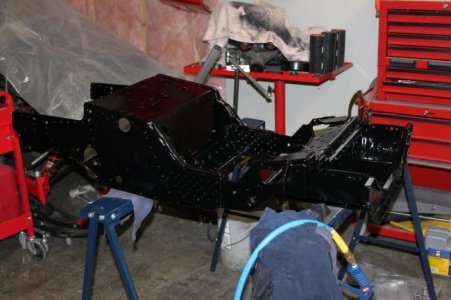
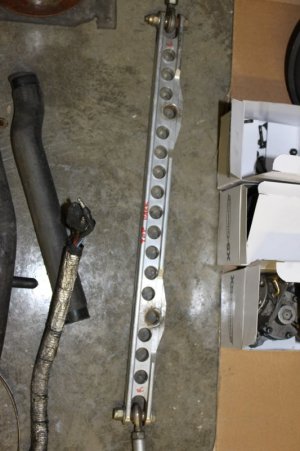
Second pic is the rivets that were replaced along the rear of the bulkhead where it joins to the tunnel braces
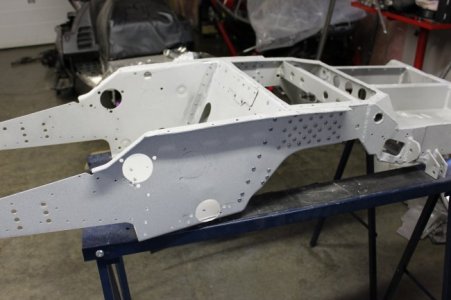
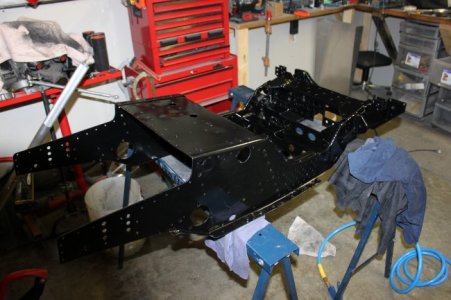
Third pic is of some of the gussets and welded areas
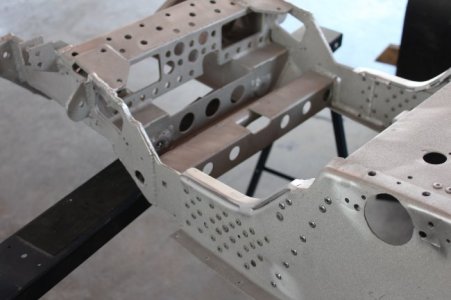
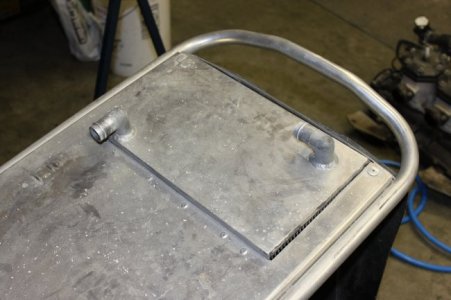
Fourth pic if of the addition bracing and gussets on the top of the cradle
More pics and updates to come in a couple days. I will post a pic of the bulkhead when I pick it up.
The objective of this is to show folks a little of what I do with it, get some input on it and demonstrate to everyone out there that sledding can be an economical and fun sport. Being that sledding is a bit of a passion for me, you might see things in here that you wouldn't do, and that's OK. No you don't need a 300 HP sled to have fun on the hills. And you can build a decent sled for the hills, with a little know-how, ingenuity, and sweat equity (aka hard work) and not a ton of cash in your pocket.
I hope to update this weekly as things progress or more often, depending on time. This will be the first installment. I usually do all the work myself with the exception of some specialized things like powdercoating, but if you have any questions please feel free to ask. Please feel free to comment and make suggestions if you can. This will probably be the longest post I have on this thread. Always remember to wear the proper safety stuff (eye protection and hearing protection, gloves, etc) when working in your shop. Thanks and see you on the hill!
Pics are attached in order of sequence as well, so easy to follow along.
1) Ok so first I have a complete and running sled, but somehow I decided that I should replace the bulkhead with a lighter one (I think it was the summer heat...... actually this was in the works for the last little while). This bulkhead already had a substantial drop and roll, which was a factor in the decision. I was planning on d&r'ing this sled anyway, this just meant it saved me some work (at least on the bulkhead anyway).
2) Tore all the pieces off the donor sled and found some issues, had to straighten a few pieces and found some things that will come out in the wash later, but overall things were in good shape so the decision was made to continue on with the build on this project. If you have any serious concerns about what you are about to do, this is the time to stop, not halfway through. You will still be able to recover most of your costs to this point and you won't end up tearing your other sled down so that you have two non-working sleds
.3) I ended up with another 1/2 sled in my garage (already have 2), which is the donor sled for the bulkhead, so I tore it down, sandblasted it and welded up all the holes and added some gusseting to strengthen it as well. First I measured and squared the bulkhead, then I braced the areas where the chassis will flex as the eventual plan is to put some decent power in place.
Its a good idea to square things up before you start, this is the foundation of where you will be building everything from. Sandblasting before you fix things will really help you to be able to see where things need to be welded etc. Also it removes the grease and grime that will contaminate your welds. Use TIG to weld, you will get the best penetration.
4) Once everything was welded and ground down, I added some rivets and replaced some others that I thought looked loose or didn't like the look of. This is the time to do things right and use the right rivets, don't use the cheap Canadian Tire ones with the aluminum shank, go to Acklands or Bolt Supply or your local outlet and buy some steel shank rivets, they are much better and wayyy stronger.
Use 3/16 rivets if you can, I just use a hand riveter that I drilled out the biggest tip to accept the larger mandrel (shank) on the 3/16 rivets. It takes a lot more to pull them and snap them off, but they are far stronger than the 1/8 rivets. Watch out for flying objects if you use the bigger rivets, the shanks literally fly out of my rivet gun. I also use backer plates/washers to help distribute the load on the surrounding metal, this makes a big difference IMO.
5) Once everything was prepped, I gave it a final wipedown and bead blasted the weld areas to clean up any things I could not get with the wire wheel and grinder or die grinder, then I wiped all the surfaces with alcohol to remove any residue.
6) Yesterday I dropped it off at the powder coaters (JIT Coatings) in Calgary. These guys are awesome and did all the powder coating on my other sled, as well as a bunch of work for my buddies trucks, plus the a-arms and rear susp arms on this sled last year. I can't buy the paint for the price of powdercoating the whole bulkhead. They do great work and can turn things around in short order (unless you want some fancy special colour that changes in the sunlight etc etc).
This one is basic gloss black, I will have it by Friday of this week, probably will get a call on Thurs saying it is done. There is a reason I have been a repeat customer. I chose black because it is a very easy colour to match and fix. If the bulkhead gets a chip in it, a jiffy marker is all that is required for touch up.
I didn't bead blast the entire bulkhead so there will be a very very very slight blemish in the powder coating on some of the bigger panels due to the rougher texture of the sand that I used, however unless you get your nose about 1/2" away from it, you won't even notice it. Also, most of the bulkhead is shrouded anyway, so again, very hard to notice. If this wasn't a back up and was going to be a show sled, I would have bead blasted it after the sandblasting.
7) In the meantime I cut a new tunnel extension, and will continue to tear down the rest of the other sled in preparation for swapping the parts to the new bulkhead and completing the drop and roll on the tunnel.
First pic is the bulkhead after I took it off
Second pic is the rivets that were replaced along the rear of the bulkhead where it joins to the tunnel braces
Third pic is of some of the gussets and welded areas
Fourth pic if of the addition bracing and gussets on the top of the cradle
More pics and updates to come in a couple days. I will post a pic of the bulkhead when I pick it up.