
You are using an out of date browser. It may not display this or other websites correctly.
You should upgrade or use an alternative browser.
You should upgrade or use an alternative browser.
Two Phazer build!
- Thread starter SC Carts
- Start date

snowho
Active member
will it do 100mph
- Thread starter
- #24
will it do 100mph
Will only know that when we put it on the snow for the first time, with that being said were not looking for top end but rather low and mid range for boondocking. So we will see.
- Thread starter
- #26
14000km sleds and then going to turn into mods and keep running. Go Yamaha! Probably less than a $1000 maintenance tab to get there.
14k on the one and 10k on the other, it's rather incredible to be honest!
tmo1620
Active VIP Member
will it do 100mph
Only joey's could, the proto phazer of old
14k on the one and 10k on the other, it's rather incredible to be honest!
That is incredible! the only phazer i have ever rode with was with an old dude trail riding and the motor blew while easily cruzing though some bush trails and there was only 500km on the sled.
- Thread starter
- #29
Hey Guys
With sled season upon us we have decided we will only be able to complete one of the Phazer builds for this year (this is due to our on going golf cart orders, who would have thought orders for custom golf carts would still be pouring in) Of course we have decided on building the supercharged Phazer! So with that being said the other Phazer is for sale. If anyone is interested shoot us a PM.
With sled season upon us we have decided we will only be able to complete one of the Phazer builds for this year (this is due to our on going golf cart orders, who would have thought orders for custom golf carts would still be pouring in) Of course we have decided on building the supercharged Phazer! So with that being said the other Phazer is for sale. If anyone is interested shoot us a PM.
- Thread starter
- #30
- Thread starter
- #31
Hey guys we have made some more progress check it out! HOLOMIS INTERNATIONAL : Phazer builds
Also with so much interest in our new blog we have decided to start what we call upload Tuesday, so every Tuesday there will be new content loaded onto the blog, some might be sled related, golf cart related or motorcycle related, sometimes it maybe some of everything, it just depends what we get done that week. We have done this so that everyone doesn't have to keep wondering if something has been loaded or not, now you know every Tuesday there will be some new content!
Also check out our new website The Official: Simolo Customs Website - Vernon, BC sign up for our newsletter and have a look at our parts page, we will be adding new products as we find and test products that we think everyone should have!
Thanks for following our builds!
- Thread starter
- #32
Hey Everyone
It's UPLOAD TUESDAY, checkout our blog for the latest of what's going on with the Phazer build and other cool projects: HOLOMIS INTERNATIONAL
It's UPLOAD TUESDAY, checkout our blog for the latest of what's going on with the Phazer build and other cool projects: HOLOMIS INTERNATIONAL
Attachments
- Thread starter
- #33
It's our favorite day of the week again UPLOAD Tuesdays checkout the progress on our blog HOLOMIS INTERNATIONAL : Phazer builds
Attachments
- Thread starter
- #34
It's UPLOAD Tuesday check it out HOLOMIS INTERNATIONAL
- Thread starter
- #35
Hey Guys
Some of you may know and some may not, with some new and exciting developments in our custom golf cart division we had to make some decisions and one of those decisions was to close down our snowmobile and motorcycle division. This allows us to focus where we need to be focused and that is with the golf carts. That has not changed our enthusiasm for the snowmobile industry, however it has made the snowmobile and motorcycle industry only a hobby for us now, no longer a business. So with that being said, our snowmobile and motorcycle builds will no longer be included on our new blog SC CARTS | Custom Golf Carts in Vernon, BC the new blog is strictly golf carts now.
This doesn't mean we are not going to finish building our Phazer and posting about it, it just means we will be posting the entire build right here! So follow along as we pick up where the blog left off.
- Thread starter
- #36
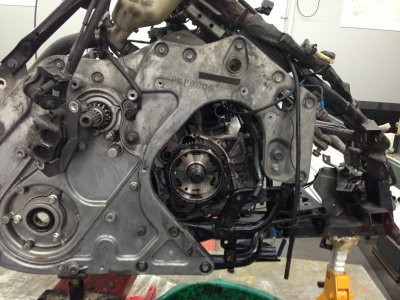
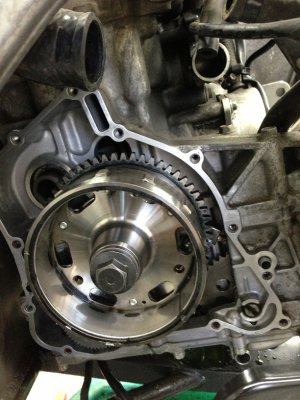
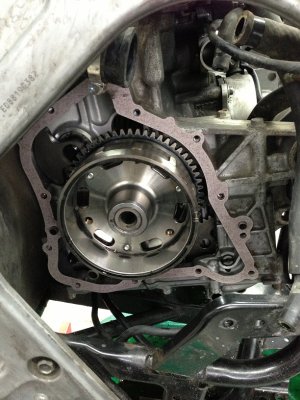
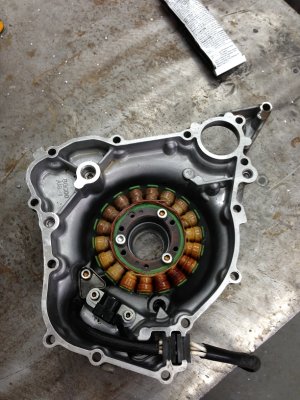
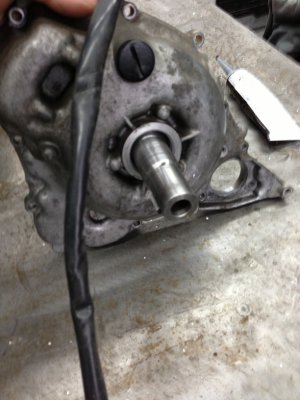
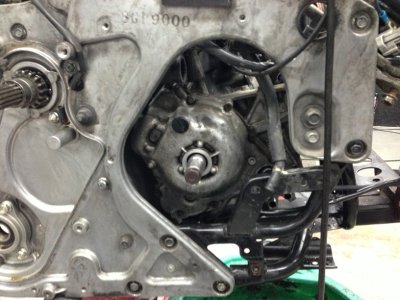
We wanted to get the motor closed up so we proceeded with cleaning the engine side mating surface. Then we cleaned the engine side cover mating surface. Once we cleaned everything really well, removing the old gasket, we applied some silicon in the 3 required areas and then installed the new factory gasket. We then installed the PTO extension through the engine side cover, and got the engine side cover mounted in place. Once everything was lined up with installed all of the engine side cover allen bolts and torqued them down to spec. We then installed the new longer supplied PTO extension bolt and torqued it down as well. That completed our engine cover installation. From there we got back to our tunnel.
Attachments
- Thread starter
- #37
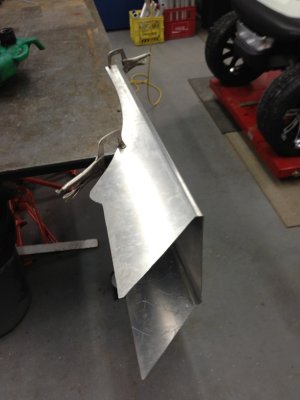
Now that we have the engine side closed back up we want to get on to finishing the tunnel, that way we can continue on with the Supercharger install when the tunnel is off at powder coating.
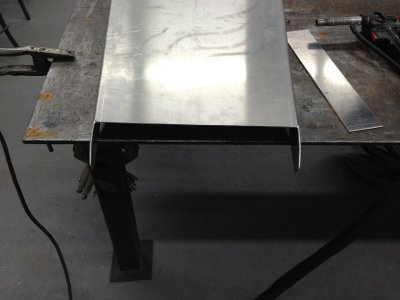
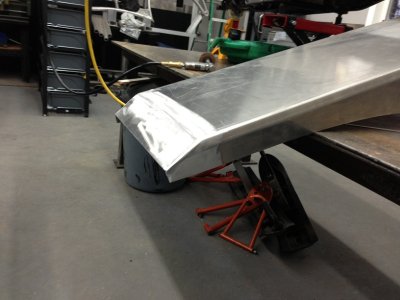
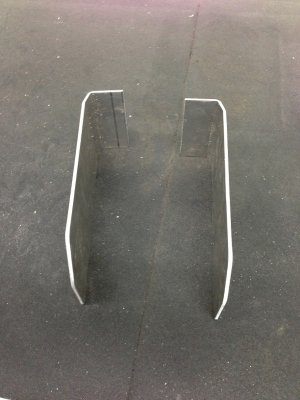
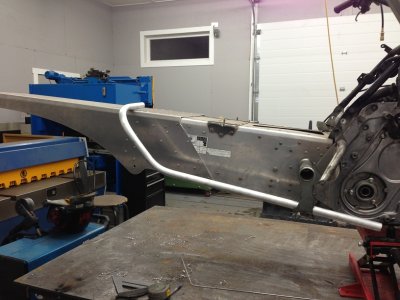
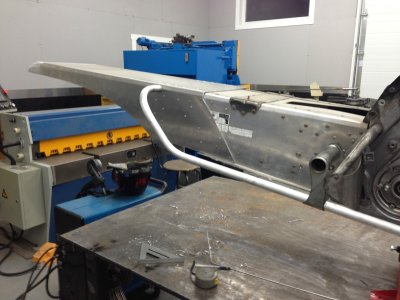
With the tunnel already formed and test fit, we now moved on to finishing the edges and final shaping, along with finishing the rear of the tunnel.
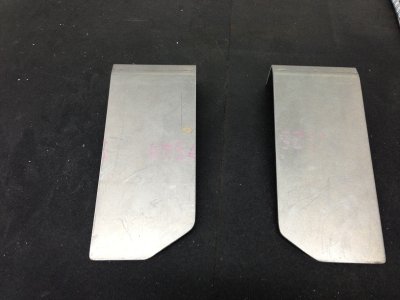
We trimmed the rear portion of the tunnel at an angle and made a filler plate. From there we welded it in place and then blended it out to look like one piece.
With the tunnel already formed and test fit, we now moved on to finishing the edges and final shaping, along with finishing the rear of the tunnel.
We trimmed the rear portion of the tunnel at an angle and made a filler plate. From there we welded it in place and then blended it out to look like one piece.
Attachments
- Thread starter
- #38
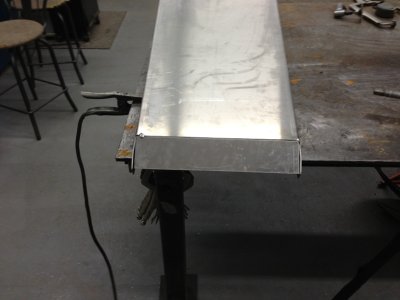
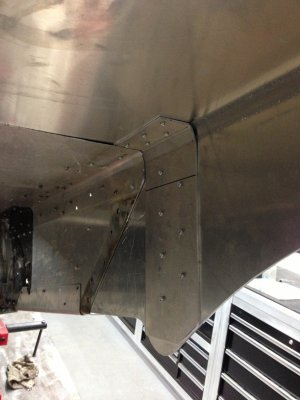
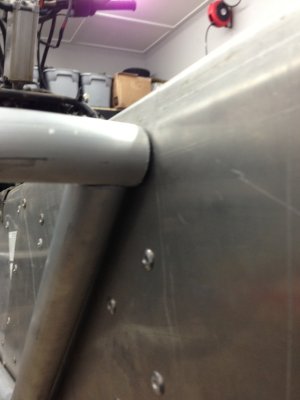
After we were happy with the finish of the tunnel we installed it on to the factory portion of the Phazer tunnel. After several measurements we clamped it in place and then proceeded to drill two holes. We then inserted two clicko's to hold the tunnel in place.
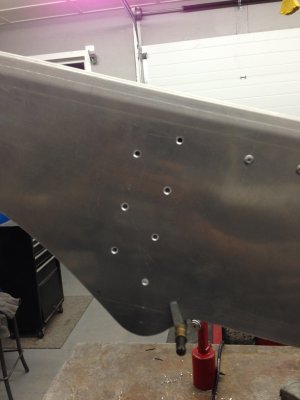
We then formed to tunnel reinforcements, these will double the strength in the suspension area. Once we were happy with the mounting location of the reinforcements we used a clicko clamp to hold it in place while we drilled our rivet pattern. We then riveted the piece in place.
We then formed to tunnel reinforcements, these will double the strength in the suspension area. Once we were happy with the mounting location of the reinforcements we used a clicko clamp to hold it in place while we drilled our rivet pattern. We then riveted the piece in place.
Attachments

- Thread starter
- #39
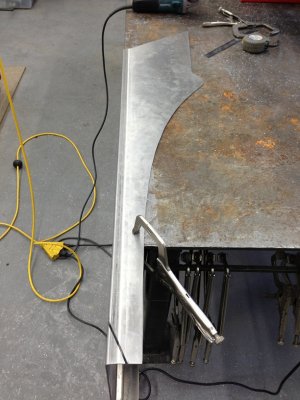
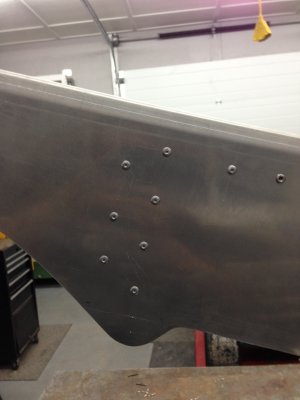
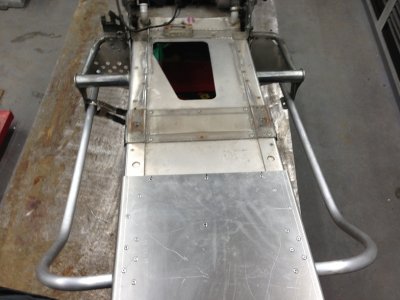
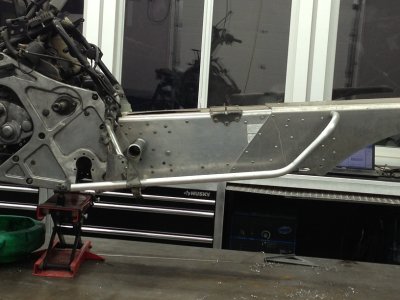
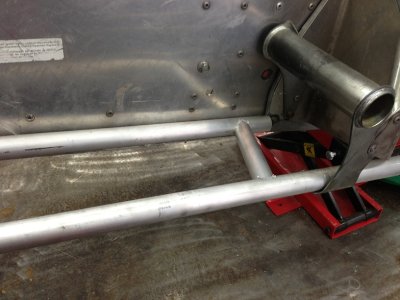
With the tunnel installed we were able to move onto the running boards. You can see a picture of the reinforcement installed from the back side of the tunnel. The running boards will also be mounted through this reinforcement area as well.
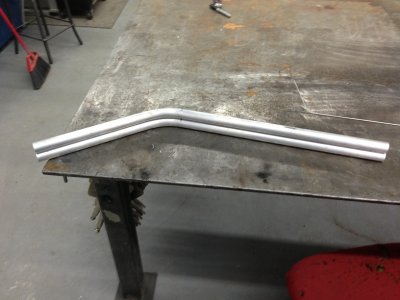
We first bent up the outside rail and test fit it, we then trimmed it to size so it would fit properly on the tunnel. Notice how the outer tube ends right over top of the reinforcement plate. This will allow us to tie the entire tunnel together using the running boards.
Once we got the one side completed we simply duplicated a left hand version for the other side. It's starting to come together now!
Attachments
- Thread starter
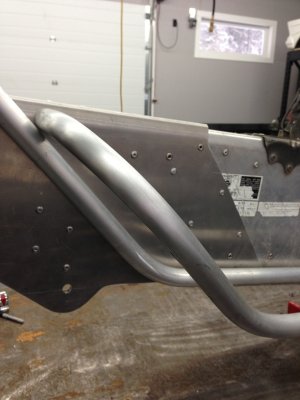
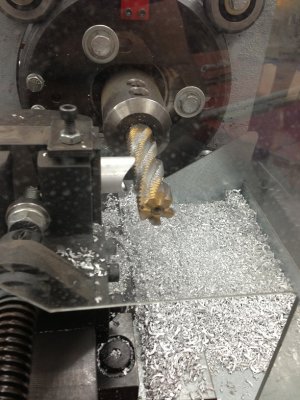
- #40
With the outside rail done, we moved on to the inside rail. Again we took this to our bender and matched the angle of the outside rail. We test fit it and then took it to our coping machine and coped it to fit nicely under the outside bar. Once we were happy with the fit we proceeded to the cross bars for the feet. The same process is done here, we cut the tubes and then set our coping machine to come at the proper angle, from there we cope the tubes and test fit them.
Attachments
Similar threads
- Replies
- 39
- Views
- 4K

- Replies
- 1
- Views
- 607
