Hillclimber
Active VIP Member
a polairs thing eh!!!!!!!!!!!!!!!!


a polairs thing eh!!!!!!!!!!!!!!!!
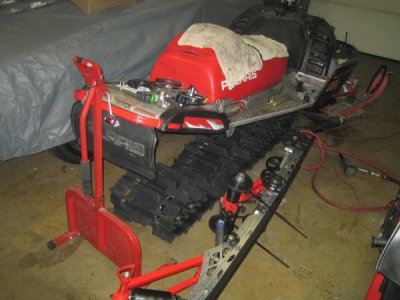
So it's been a frustrating week. Nothing seems to be going as well as I had hoped.
Mostly it's parts that I'm missing or now need because I broke it.
Taking out drives is more work than I thought it would be. Good thing for Wobbly Pops...
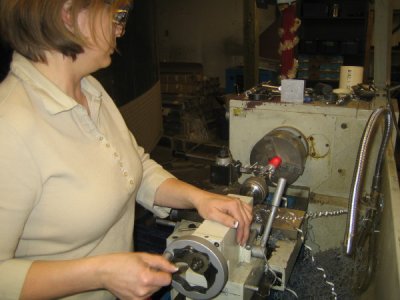
Here are a couple things to note if someone, like me, is pulling drivers.
1. C clips that hold the bearing in on the Chain case are brutal to get out..patients...beer...patients.
2. When pushing the driveshaft into the chaincase be very careful, you can damage the seal as I did. Now I have an additional repair to complete.
3. Check the drivers, this is the time to replace them. Mine are shot so tomorrow I go hunting for new ones.
4. Replace bearings, easy now, much harder later.
This is a time consuming project. Takes lots of patients and is nice when it's done...I think, I still have to get repairs and put mine back together. It's also nice to have a second pair of hands, I didn't and I wish I had someone to help....where is Summitric when I need him...drunk in Mexico...lol...
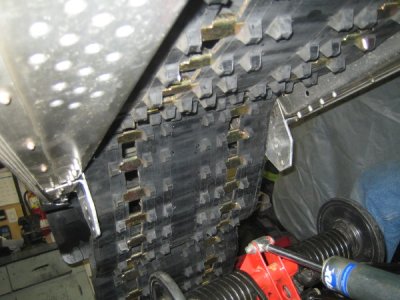
I pulled the whole chaincase off on mine when I changed my track much easier then trying to remove that snap-ring in place.

On my '04 VE, i was able to remove the drive shaft without removing the snap ring or the chain case. There was enough room to slide it towards the secondary and then out. Very easy and you don't have to realign the jack shaft.
 That's just me though.
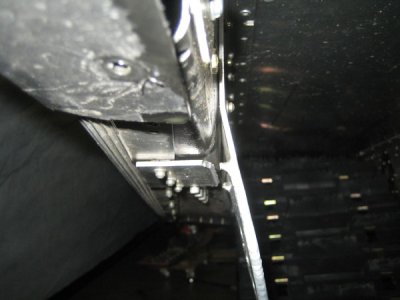
Its recommended in the shop manual to do so once the chain case is removed and you will need the alignment tool. And if something is going to fail or self destruck because of a missed or overlooked step. It will happen to ME!! My buddies say " if it wasn't for bad luck, I wouldn't have any luck at all."
Yup, Realign, And You Shoulda Pulled The Whole Case Off, Doofus!!! What About Dropping A Tooth On The Gears Now That You´re There???
99summitx said:Morale support from afar
hey...to drop in a 151 by 2" track on my 98 700, would it be absolutely neccesary to drop and roll it?