Diamond drive bearing upgrade thread with lots of pictures

IGBT

Active member
Joined
Dec 23, 2011
Messages
43
Reaction score
11
Location
Washington
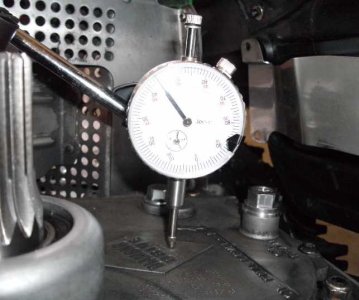
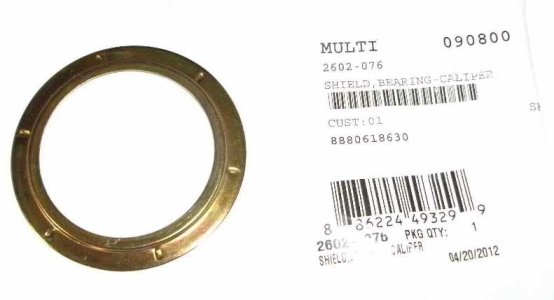
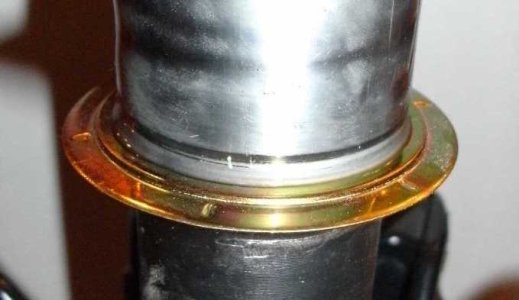
I just drained the oil from my DD into a cup and it is about 11 ounces of oil!!! I was only expecting there to be around 3 ounces. Either the 3 ounces is wrong, the dealer overfilled this unit, or somehow water got into the oil. I will let it sit and see if it separates.

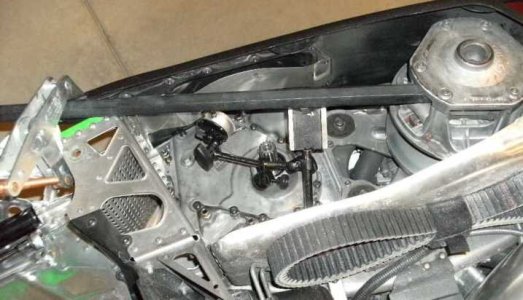
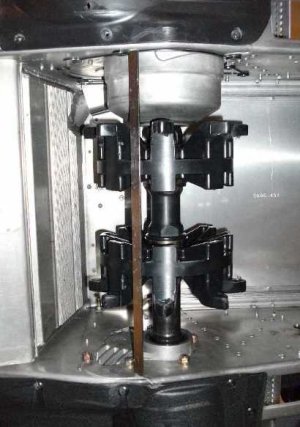
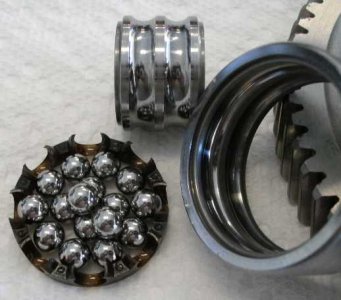
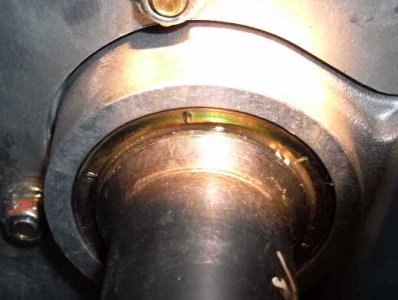
There were a lot more metal fragments in the bell housing under the planetary gear system...quite a handfull.

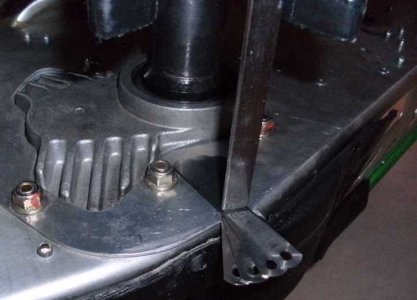
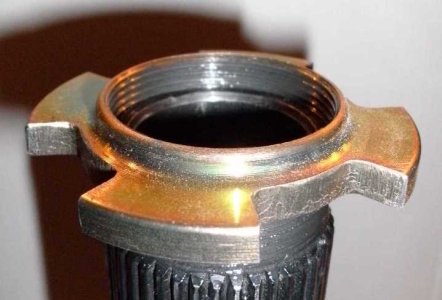
All of this on a sled with barely 200 miles on it.
 

IGBT

Active member
Joined
Dec 23, 2011
Messages
43
Reaction score
11
Location
Washington
The 05-06 take 3 oz. the 07-08 take 12 oz and the 09-11 take 15 oz.

Ah, ok, thanks. That makes me feel better. I can believe there was 14 or 15 oz in my unit prior to splitting it apart.

I took it to the dealer and let them look at it, and they said they would just put on another crapmatic 2000 bearing and call it good, so I decided to just clean it out and put in the 3203 bearing myself even though it is under warranty. After that I will be reporting AC to the BBB for all the good it will do.
 

IGBT

Active member
Joined
Dec 23, 2011
Messages
43
Reaction score
11
Location
Washington
Hey so one more question. How easy/hard is it to remove the final drive shaft in the DD so that bearing can be inspected? I mean the shaft that is connected to the planetary outer ring. When I turn that shaft it is little scratchy sounding....not silky smooth like the secondary shaft. I am curious if any of the metal fragments have gotten into whatever bearing is down there. It does turn freely, but will not continue to spin if given a good whirl like the secondary shaft will.

Edit: Nevermind...I feel silly. Turn the housing over and the final drive shaft just falls right out of the DD. orange colored seal looks fine, and the large bearing on the final drive shaft seems to spin smooth too, but I will give it a good cleaning with diesel fuel, then a gear oil soak.
 
Last edited:

IGBT

Active member
Joined
Dec 23, 2011
Messages
43
Reaction score
11
Location
Washington
Got my SKF 3203 C3 bearing on! I wanted to machine down the shaft and measured that it needed about the 0.040 as mentioned in this thread.

I didn't have much in the way of tools to do this, but I managed to make a center for my collet lathe out of some 1" bar stock in my junk bin.

I mounted the gear between this and a live center in the tailstock. The pressure on the fixed center in the collet against the gear was enough to make it turn without a dog.

I didn't use the mickey mouse grinding wheel seen in the photo, but instead used a carbide lathe bit...the hardened steel shaft was a bitch, but I got er done.

Final pic, happy bearing!

step1.jpg step2.jpg step3.jpg
 

Modman

Active VIP Member
Joined
Mar 13, 2008
Messages
6,009
Reaction score
8,340
Location
Castlegar
Bringing this one back to the top for one question: When putting the cases back together, did you guys put it back together with just the dry gasket or did you use RTV/Gasket sealer on the gasket as well?

Thanks
 

IGBT

Active member
Joined
Dec 23, 2011
Messages
43
Reaction score
11
Location
Washington
I ordered 2 new paper gaskets ($10 each) and just used one of them with a very very light rub of oil...no sealant or anything. I spent an hour carefully cleaning off the old paper gasket and hope that the light rub of oil will prevent this new one from sticking.

There isn't really a lot of pressure in the DD...I don't think you need to go crazy sealing it. I did use a digital torque wrench to tighten the hex bolts to 43 inch pounds...some on here have tried 40 foot pounds or something lol...they may need that sealant.
 

CuzzinOlaf

New member
Joined
Nov 19, 2012
Messages
1
Reaction score
0
Location
Michigan
I purchased one of these SKF 3203 C3 bearings with seals (will remove them and clean the grease out):


I am curious about how the DD oil works though...do I drain it using the drain plug and refill it with the cover off, or can you fill it with the cover on and the sled in the normal position?

I just purchased this same bearing and am wondering if I really need to remove the seals? I have no problem doing it but want to hear why and if it is a must. Also, did you have any issues getting the case closed back up after installing the bearing?
 

syncmaster15gli

New member
Joined
Nov 10, 2012
Messages
1
Reaction score
0
Location
Esterhazy, SK
From what I have read on this, any bearing used in high speed applications do not use seals. The reason for this is when the bearing turns at a high rate of speed, the sealed bearing grease breaks down, and seeps out of the seal and into the oil. This further breaks down the oil and causes problems. There is a nice writeup in one of the threads on this site about this. There is enough oil fog in the diamond drive to lubricate the bearing in this setup.
 

IGBT

Active member
Joined
Dec 23, 2011
Messages
43
Reaction score
11
Location
Washington
I just purchased this same bearing and am wondering if I really need to remove the seals? I have no problem doing it but want to hear why and if it is a must. Also, did you have any issues getting the case closed back up after installing the bearing?

I removed the seals because (as others mention) I didn't want whatever grease SKF used to contaminate the synthetic gear oil in my DD...and I think the thinner lighter 75-90 gear oil would be better for the bearing at high speed.

It is extremely easy to remove the seals, then you need to use some solvent to clean out the grease. I used WD40 at first, then switched to diesel fuel. I then dipped the bearing in new synthetic gear oil after the WD40/diesel had evaporated.

Oh, and as to closing up the case, I went ahead and machined down the bearing seat on my lathe such that the new bearing fit the same as the old bearing (I took off 0.040" from the shoulder). The case fit back together perfectly.
 
Last edited:

bigdog67

Active VIP Member
Joined
Nov 20, 2006
Messages
477
Reaction score
152
Location
Edmonton
OK..I'd like to know on a 08 M8, do you have to machine the shaft because of the thrust bearing and washer,or does the 5203 fit?
 

Modman

Active VIP Member
Joined
Mar 13, 2008
Messages
6,009
Reaction score
8,340
Location
Castlegar
OK..I'd like to know on a 08 M8, do you have to machine the shaft because of the thrust bearing and washer,or does the 5203 fit?

If you don't want to machine the shaft, there is an updated spacer that is 40 thinner and takes care of the torsional load. I have the part # at work, I can get it tomorrow, let me know.
 

Modman

Active VIP Member
Joined
Mar 13, 2008
Messages
6,009
Reaction score
8,340
Location
Castlegar
Thanks Modman,that would be great. Thanks...

updated bearing spacer Part # 2602-259. Confirm the thickness when you get it, if needed you can machine the spacer down more instead of machining the shaft shoulder, but the new spacer should be 40 thou thinner than the original. Item #13 on this microfiche


Its used on all the new DD's right up to the Bearcats and 570 that are still using the DD for 2013
http://www.arcticcatpartshouse.com/oemparts/partsearch/arctic_cat_snowmobile
 

Paul2727

Active member
Joined
Dec 28, 2011
Messages
30
Reaction score
36
Location
Reno, NV
I just purchased this same bearing and am wondering if I really need to remove the seals? I have no problem doing it but want to hear why and if it is a must.

Because the bearing will overheat while spinning at 6000 rpm in thick factory grease; char-broiling the grease, damaging the bearing due to heat distortion, and blowing the seals. Which will cause the grease to contaminate your DD syn-lube. The seals cause harm in a DD, and don't do anything good. Clean, pure, syn-lube DD oil is a much better lubricant.

The seals are for farm planter wheels, which are the most common use for that specific size bearing. Those are slow-speed, dirty applications where seals are helpful, to keep the dirt out. Very different situation in a DD.
 
Last edited:

bigdog67

Active VIP Member
Joined
Nov 20, 2006
Messages
477
Reaction score
152
Location
Edmonton
Does anyone have any suggestions for a machinist in Edmonton. FYI... On the 08 M8 you WILL be machining the shaft.
 

Paul2727

Active member
Joined
Dec 28, 2011
Messages
30
Reaction score
36
Location
Reno, NV
Pictures and details about my 2011 M8 HCR:

Used a dial indicator (picture #1) to measure my Diamond Drive (DD) gear case move outward 0.095" as I loosened the DD mounting bolts. After re-tightening, the dial indicator went back to zero, which proved my make-shift foundation was solid (picture #2). That measurement could be off due to dial indicator flex. Couldn't believe the tunnel moved that much, so I measured inside my tunnel using a steel bar and feeler gages (see pictures #3, #4 & #5). I cut the bar to fit exactly inside the tunnel. Then tightened the DD and used feeler gages to measure 0.105" of outward tunnel flex as shown in the picture. That measurement could be inaccurate because it was a few inches away from the drive shaft center line. I decided to average the two measurements and use 0.100" for my tunnel flex measurement. In addition I had to allow for the brake-side bearing shield that Arctic Cat did not install, which is 0.016" thick (P/N 2602-076, $3.99, pictures 6 & 10).

With a new SKF 3203 bearing installed, my DD has 0.012" of axial free play at the output shaft, as measured with a dial indicator. I want that free play to be fully extended, with the DD output shaft up against the DD output shaft bearing. It's better to have the track drive shaft in tension, rather than compression, which axially loads the 6203/4203/5203/3203 bearing.

In addition, I allowed 0.002" for; a) measurement errors; b) tension in the drive shaft and; c) rounding off my numbers.

For all those reasons, I machined 0.130" from my HCR track drive shaft (0.100" tunnel flex + 0.016" bearing shield + 0.012" DD free play + 0.002" extra).

Found my track drivers were 1/16" (0.062") closer to the DD side (offset about 0.031" from the tunnel center line). So the first thing was to machine 0.062" off the drive shaft brake-side shoulder to center the drivers, plus allow added space for the bearing shield (0.016"), plus the rounding amount (0.002"). With that, the first 0.080" had to come off the brake side of my track drive shaft. The balance (0.050") was split between the two sides, or 0.025" each. Picture #8 shows 0.025" machined from the DD end of my drive shaft, and picture #9 shows 0.105" (0.080" + 0.025") machined from the drive shaft brake-side bearing shoulder.

This proved to be less than what was actually needed. After reassembly, I still have 0.010" outward tunnel flex, or about 1/10 of what it used to be. Maybe the splines or rubber seals will "settle in" after some run time. I'll check it at the end of the season. Since the BDX 5203 bearing survived for 700 miles with 100 thou of axial pressure, it will probably survive 7000 miles with only 10 thou of axial pressure from tunnel flex. Good enough - job done!

History of my sled: At 300 miles the stock A/C DD 6203 bearing in my HCR was shot and replaced with a BDX 5203 by the previous owner, with no DD transfer shaft or drive shaft trimming. Now the machine has about 1000 miles and amazingly the BDX bearing was in good shape (see picture #7). The BDX (Peer) 5203 is obviously much stronger than the stock Arctic Cat 6203. The 5203 endured several hundred miles under high axial load, and was only 0.001" loose in the axial direction. I replaced the BDX 5203 with an unsealed SKF 3203 ATN9/C3 with zero axial clearance. With the new SKF bearing installed, which is 0.002" wider than the BDX, the DD cover closed as it should, and the DD output shaft had 0.012" of axial free play. So there is no axial load on the new 3203 bearing due to the DD and my DD transfer shaft did not require any trimming. My entire problem was with my too-tight tunnel and/or too-long track drive shaft.

Good luck to M8 and HCR owners !! Hope this helps with your measurements, decisions and repairs. Merry Christmas!
 

Attachments

  • #01.JPG
    #01.JPG
    62.5 KB · Views: 325
  • #02.JPG
    #02.JPG
    77.8 KB · Views: 336
  • #03.JPG
    #03.JPG
    63.2 KB · Views: 321
  • #04.JPG
    #04.JPG
    56 KB · Views: 322
  • #05.JPG
    #05.JPG
    60.4 KB · Views: 327
  • #06.JPG
    #06.JPG
    38.1 KB · Views: 323
  • #07.JPG
    #07.JPG
    53.2 KB · Views: 339
  • #08.JPG
    #08.JPG
    64.2 KB · Views: 325
  • #09.JPG
    #09.JPG
    41.6 KB · Views: 317
  • #10.JPG
    #10.JPG
    53.3 KB · Views: 321
Last edited:

Paul2727

Active member
Joined
Dec 28, 2011
Messages
30
Reaction score
36
Location
Reno, NV
Picture of the installed bearing shield - note the bumps. Picture of shaft end nut, BDX p/n 50045, $5.95. Picture of nut wrench, BDX p/n 50046, $28.95.
 

Attachments

  • #11.JPG
    #11.JPG
    58.9 KB · Views: 330
  • #12.JPG
    #12.JPG
    57.2 KB · Views: 321
  • #13.JPG
    #13.JPG
    37.1 KB · Views: 327

maxandvin

Active member
Joined
Oct 1, 2011
Messages
42
Reaction score
51
Location
The Lake
Thanks for this post! I have taken my diamond drive out of the machine and am trying to separate the planetary gears from the housing where the problem bearing is located. I cannot get these apart. What am I missing? I have a 2011, I have removed two snap rings thus far and it is driving me nuts because it will not come apart and I know it will be something simple! My drive is ruined, metal everywhere and more than one wrecked bearing. GRRRRR

Thanks in advance
 
Top Bottom