DIY Sled Mods

ippielb

Active VIP Member
Joined
Mar 4, 2011
Messages
1,912
Reaction score
3,278
Location
SE Saskatchewan
Website
www.youtube.com
Just curious how many people do DIY sled mods. Not anything store bought. I'm talking grinding, cutting, moving, drilling, parts and pieces on your sled to get an improvement. Maybe even robbing parts off of another model of sled to make it work better. Post a picture of your mod, improvement, and sled. Maybe get a ball rolling on little improvements for others.


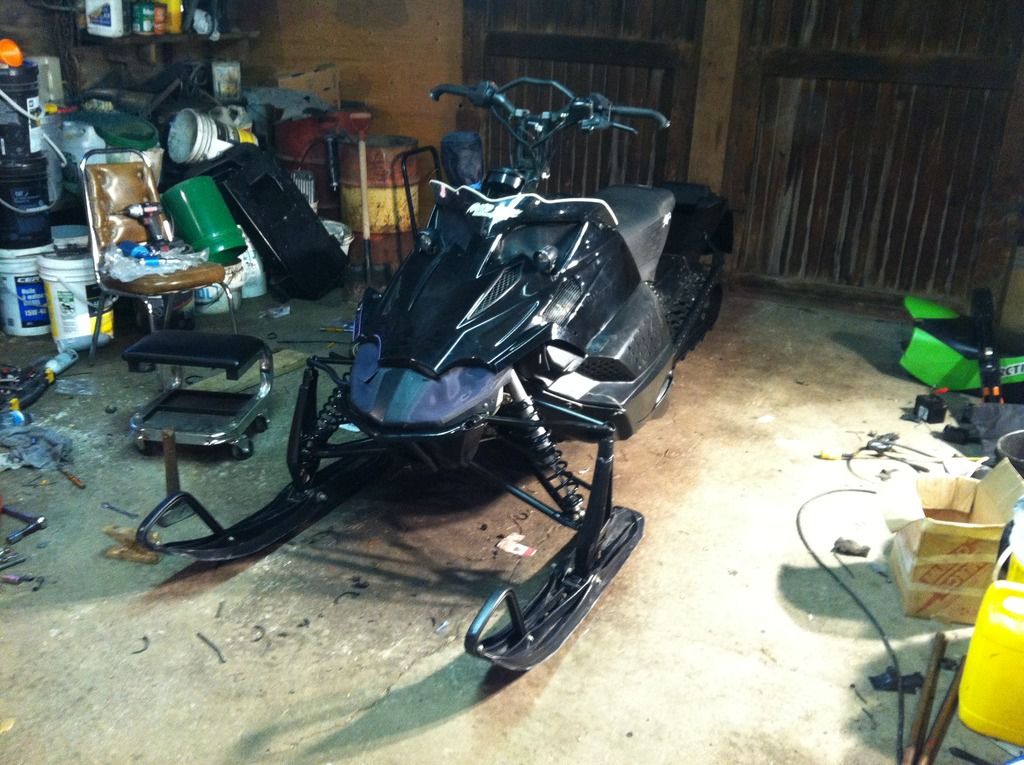
2010 Snopro 500 mod sled

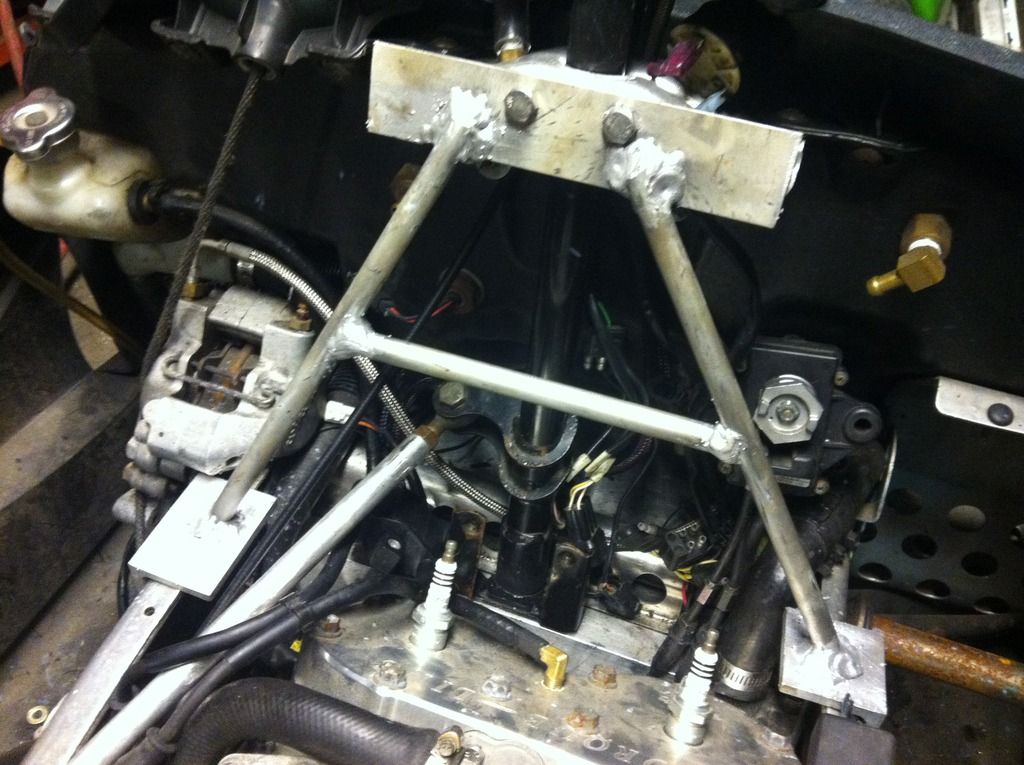
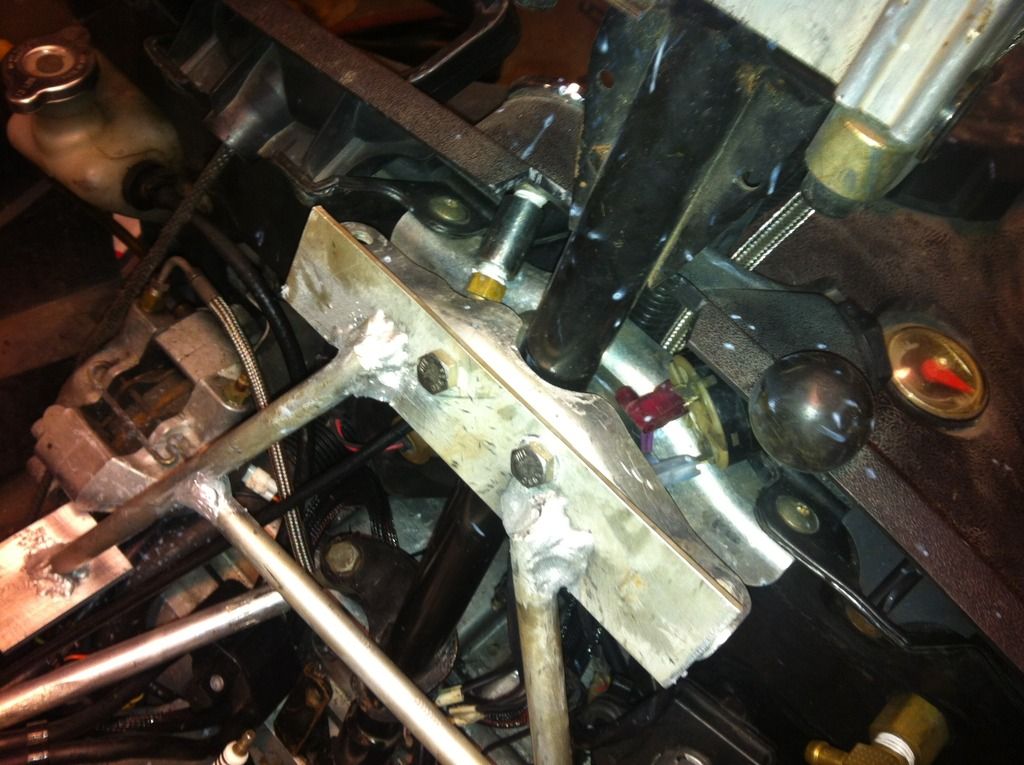
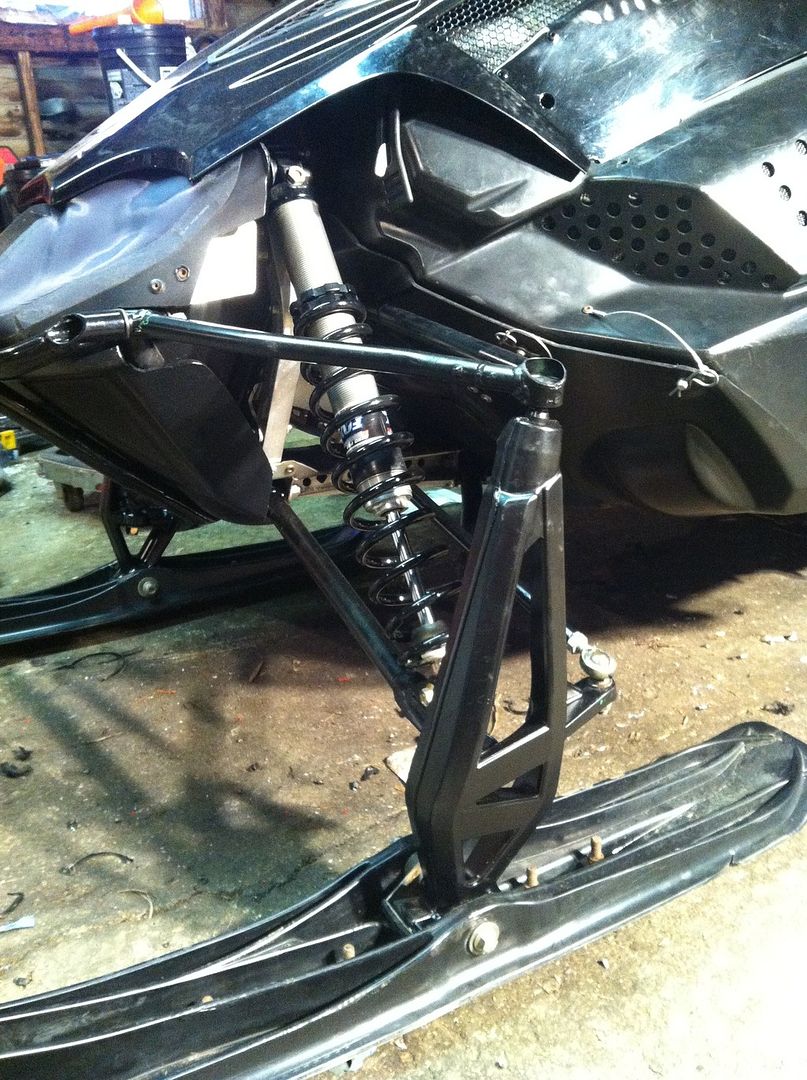
Mine isn't much, just narrow a arms, kept the longer shocks for added ground clearance, and put on proclimb spindles that are taller and narrower, taller to keep upper balljoint angle, and skinny to not act like an anchor like my 3" wide Snopro spindles. The arms had 2" cut out of each tube, and then slipped another tube inside to weld to for strength. The spindles needed to have some material taken off at the lower ball joint so it would clear it, since the Snopro ball joints have a larger outer diameter. The taper on the upper and lower ball joints is the same. I also did the 2013 tie rod hole on the spindle to get a tighter turning radius.
Heres the template I used on the spindles, made life easy to do that mod.
2013 Spindle Template for 2012 Sleds - SnoWest Snowmobile Forum

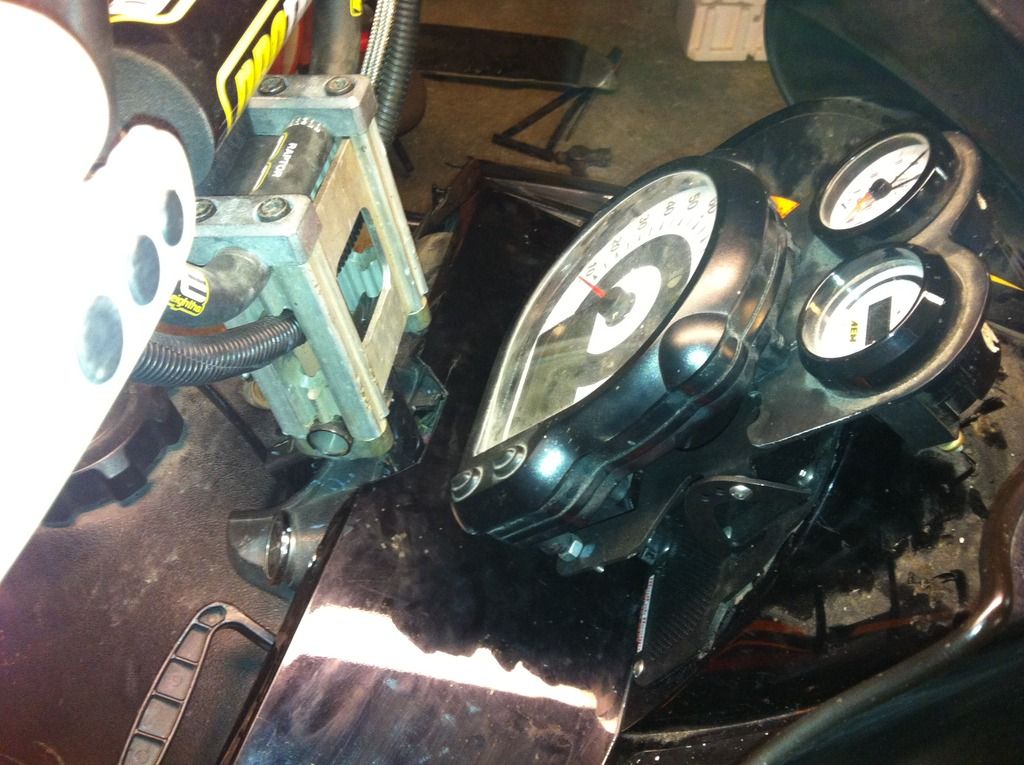
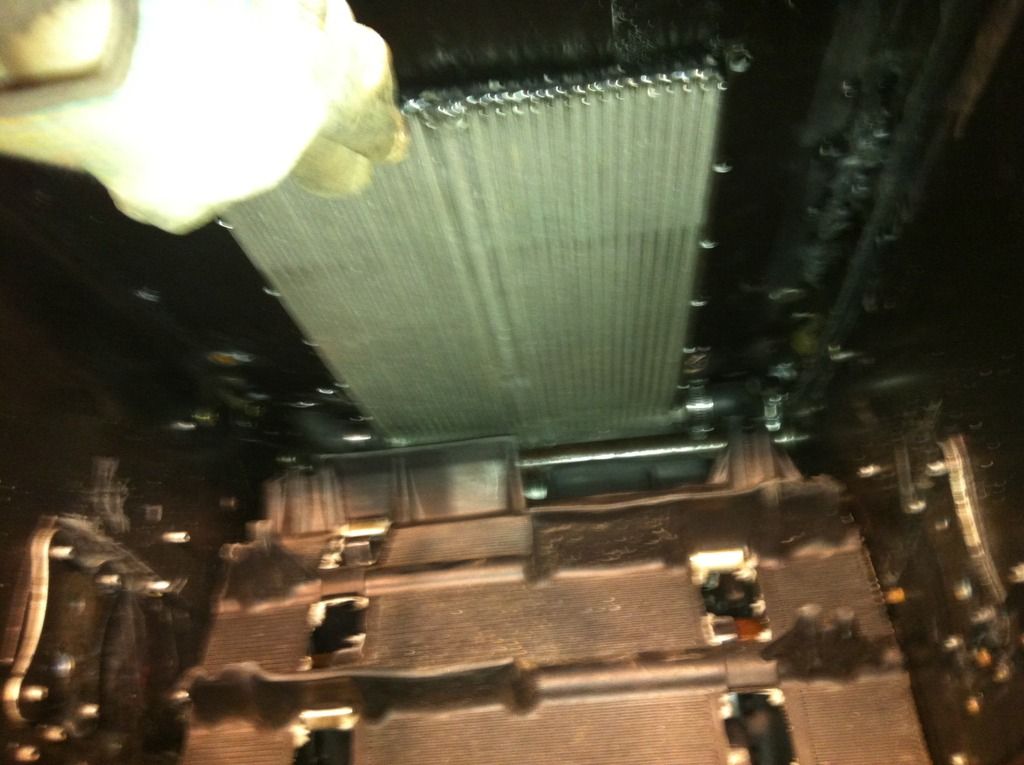
The cooler was mounted in the rear of the sled with cooling rails going through the tunnel, I removed the cooler from the rear and mounted it underneath the gas tank to hopefully cut down on ice, and to prevent it from breaking the cooling rails if I fold my tunnel again. The cooler is the rear cooler from an 09-11 m8 so it has the tip on the very end where the hoses connect. I needed the cooler to bend upwards to fit my tunnel at the jack shaft, so I put it in my press and used a couple pieces of hardwood as braces, and heated the cooler up, pressed down, and straightened it out. Then pushed it a little past straight so it would bend up with the tunnel giving me adequate clearance. I used pop rivets to hold the cooler up, and was afraid of the gas tank wiggling it might wear on the tank, so I put silicone on top of each rivet and around it to give it a bigger surface area and a buffer between the two. I let the silicone set and dry before I put the tank on so it wouldn't squish out.
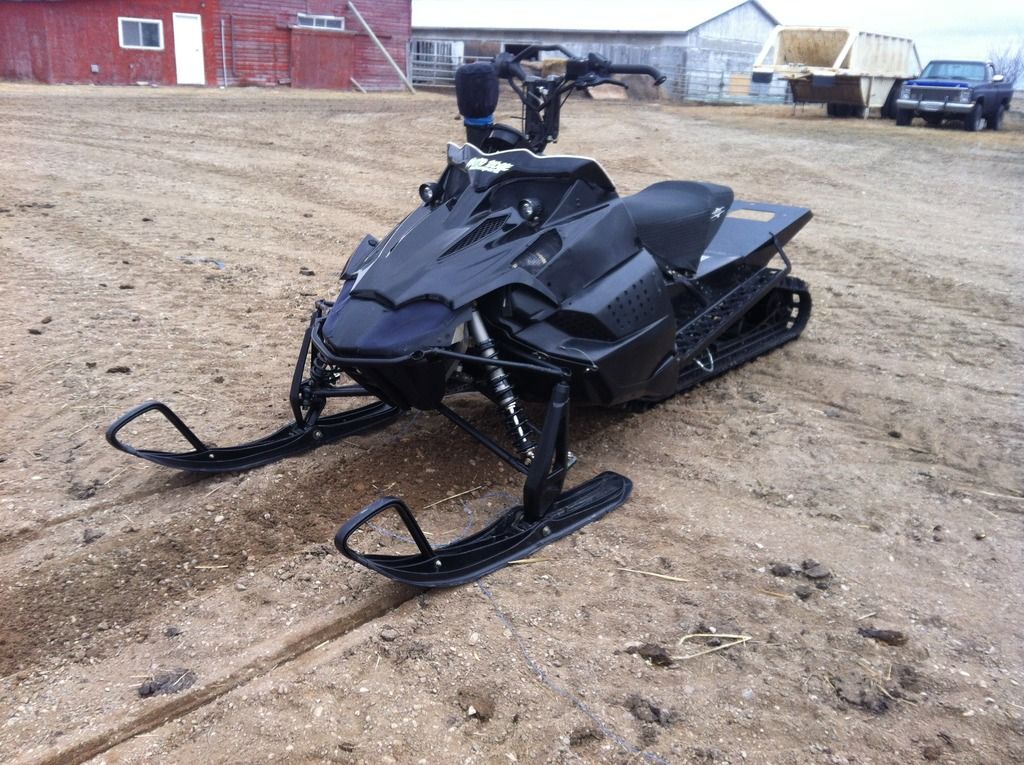


Last edited:

neilsleder

Active VIP Member
Joined
Oct 18, 2009
Messages
9,618
Reaction score
17,001
Location
Leduc Alberta
Built my self a few sets of running boards. Built them for a few guys to but can't find pictures.


Sent from my iPhone using Tapatalk
 

52weekbreak

Active VIP Member
Joined
Jun 17, 2013
Messages
1,929
Reaction score
4,058
Location
SPAB
Very nice. I see from your pics you are a farmer so likely have been twisting wrenches since you were a kid. You also have tools and a shop which you are always putting to good use - sometimes even on farm equipment. Ha ha. - liked the part of "in case I fold the tunnel again..."

Good job and I wish I had a bit, well a lot more, of your skill and determination. Don't imagine you got much local use out that baby this year.
 

ippielb

Active VIP Member
Joined
Mar 4, 2011
Messages
1,912
Reaction score
3,278
Location
SE Saskatchewan
Website
www.youtube.com
Some other mods I've done on another sled.

Shorter titanium a arms, kept the longer shocks with titanium springs, and bent ride rods . Comparing to the other side with short shocks you can see you gain some ground clearance. Which is the new trend with these 2017 sled's a higher centre or gravity and ground clearance.
IMG_1678.jpg


I moved my Steering Post Forward a couple inches to give it a more rider forward feel. I took a 1.5" coupler and bought extra bolts to extend the mounting farther out, I had to grind off some of the front of the steering post st the bad to allow it to lean farther forward and keep it flush. Also the radius rod from the post to the pitman arm had to be shortened, I used stock hardware to relocate the post forward so it doesn't look too terribly out of place. You can also see I mounted my fuel pressure gauge in the extra pod on my dash, fits perfect.
IMG_1716.jpg


Mounted my boost and AFR Gauge to the studs on my gauge with my gauge lifter, it gets some crap off of my handlebars which is always nice. I drew on two lines onto a piece of thin plastic and drilled it to fit onto the gauge, so I know my needle has to be between those two lines, I think analog has that advantage over digital, I don't need to read, I can just glance.
IMG_1717.jpg


Made an A-Frame to support the handlebars. There's a lot of force being put on those studs and plastic on the gas tank. So a little support REALLY strengthened this tired old chassis up. I'm not a pro welder, I have barely welded aluminum, so this was a first attempt that I just went with, I have since mounted my servo motor onto the frame as well. I had to turn the frame a tad to clear the brake caliber and then the pipe on the other side.
IMG_1713.jpg


Close up of the post forward mod i did, I used two steering post covers and ground off to clear the post. Used stainless. bolts so I won't have to worry about corrosion. Still had room for the key, and the fuel pressure line to weasel between the two brackets,
IMG_1714.jpg
 
Last edited:

neilsleder

Active VIP Member
Joined
Oct 18, 2009
Messages
9,618
Reaction score
17,001
Location
Leduc Alberta
Some other mods I've done on another sled.

Shorter titanium a arms, kept the longer shocks with titanium springs, and bent ride rods . Comparing to the other side with short shocks you can see you gain some ground clearance. Which is the new trend with these 2017 sled's a higher centre or gravity and ground clearance.
http://i53.photobucket.com/albums/g79/halfsoldier/IMG_1678.jpg

I moved my Steering Post Forward a couple inches to give it a more rider forward feel. I took a 1.5" coupler and bought extra bolts to extend the mounting farther out, I had to grind off some of the front of the steering post st the bad to allow it to lean farther forward and keep it flush. Also the radius rod from the post to the pitman arm had to be shortened, I used stock hardware to relocate the post forward so it doesn't look too terribly out of place. You can also see I mounted my fuel pressure gauge in the extra pod on my dash, fits perfect.
http://i53.photobucket.com/albums/g79/halfsoldier/IMG_1716.jpg


Mounted my boost and AFR Gauge to the studs on my gauge with my gauge lifter, it gets some crap off of my handlebars which is always nice. I drew on two lines onto a piece of thin plastic and drilled it to fit onto the gauge, so I know my needle has to be between those two lines, I think analog has that advantage over digital, I don't need to read, I can just glance.
http://i53.photobucket.com/albums/g79/halfsoldier/IMG_1717.jpg


Made an A-Frame to support the handlebars. There's a lot of force being put on those studs and plastic on the gas tank. So a little support REALLY strengthened this tired old chassis up. I'm not a pro welder, I have barely welded aluminum, so this was a first attempt that I just went with, I have since mounted my servo motor onto the frame as well. I had to turn the frame a tad to clear the brake caliber and then the pipe on the other side.
http://i53.photobucket.com/albums/g79/halfsoldier/IMG_1713.jpg


Close up of the post forward mod i did, I used two steering post covers and ground off to clear the post. Used stainless. bolts so I won't have to worry about corrosion. Still had room for the key, and the fuel pressure line to weasel between the two brackets,
http://i53.photobucket.com/albums/g79/halfsoldier/IMG_1714.jpg

As a welder that's really good with aluminum I had to chuckle at your welds. But we Al start some where! If you want some tips on me


Sent from my iPhone using Tapatalk
 

06 Dragon

Active VIP Member
Joined
Nov 17, 2006
Messages
2,041
Reaction score
3,476
Location
Red Deer County
As a welder that's really good with aluminum I had to chuckle at your welds. But we Al start some where! If you want some tips on me


Sent from my iPhone using Tapatalk
Hello Neilsledder. Do you do High frequency intensity tig welding. If so, us polaris pro riders could keep you busy repairing our over structures
 

neilsleder

Active VIP Member
Joined
Oct 18, 2009
Messages
9,618
Reaction score
17,001
Location
Leduc Alberta
I do at work and can fix stuff no problem. I got tons of aluminum tig experience. Ask arff I fixed lots of rims for him and his buddies.
The only thing with stuff like that is sometimes it don't like to weld, the aluminum is alloyed with magnesium and don't weld. A lot of chain cases are like that, I tried welding a few and it don't turn out very nice. But I can give it a try, that will tell us for sure.


Sent from my iPhone using Tapatalk
 

Dragonalain

Active VIP Member
Joined
Apr 5, 2009
Messages
805
Reaction score
2,353
Location
saskatton
Hello Neilsledder. Do you do High frequency intensity tig welding. If so, us polaris pro riders could keep you busy repairing our over structures

I got my dad to try welding a Polaris over structure a while back with a HF tig did not work at all. The one on my snow pony is cracked now. if it last the rest of the season I'll be building a billet one this summer


Sent from my iPhone using Tapatalk
 

neilsleder

Active VIP Member
Joined
Oct 18, 2009
Messages
9,618
Reaction score
17,001
Location
Leduc Alberta
If it's just cracked now take a small drill bit 1/8 or 3/16 and drill a hole at the end of the crack, it should stop it from going any more.


Sent from my iPhone using Tapatalk
 

neilsleder

Active VIP Member
Joined
Oct 18, 2009
Messages
9,618
Reaction score
17,001
Location
Leduc Alberta
I got my dad to try welding a Polaris over structure a while back with a HF tig did not work at all. The one on my snow pony is cracked now. if it last the rest of the season I'll be building a billet one this summer


Sent from my iPhone using Tapatalk

Ask him if it starts to weld but then just bubbles and there's a purple light, that's when it's alloyed with magnesium. Tell him to try using 4043 rod, it will handle a bit more contamination then 5356


Sent from my iPhone using Tapatalk
 

ippielb

Active VIP Member
Joined
Mar 4, 2011
Messages
1,912
Reaction score
3,278
Location
SE Saskatchewan
Website
www.youtube.com
e30766416746b42f00764edc27e3144a.jpg

d522a646f8729f759fda2de733fb0a77.jpg

22626f9b7f13ec517e18188ca9e68d59.jpg

eef1566cd5631f6e95f8569efa060c2e.jpg


Still haven't been out riding, decided to narrow up my sled while I wait to get approval to go sledding.

bb25232478963442fd911872ef2c2a0d.jpg
3ade2de74f747ce01f0d36788c6316de.jpg


Got it down to about 34" at the front of the boards. Widest point is about 35". Give or take half inch on both measurements.

To my knowledge the axys is 35" at the widest point? So I'm happy with the outcome. Any narrower and the panels wouldn't have fit on the sled worth a crap.


Sent from my iPhone using Tapatalk
 
Top Bottom